Zonify allows you to design much more than Zone Plans, the sections below will hopefully show you some of the features of the system and some of the design examples,
Don't forget to look at the video page when you have looked through this page so see what designs we have done and how we do them.
When you choose to import a PDF or an image into our platform, you now have the convenient option of pressing "Ctrl + X" to activate the crop tool with ease.
This means you don't have to alter your files you can simply do this within Zonify.
Once the crop tool is activated, you can easily resize it according to your specific needs and preferences. After adjusting the dimensions of the tool to frame the section you want to keep, simply press Enter to finalize your selection. This action will effectively crop away everything that lies outside the boundaries of the crop tool, providing you with the precise and desired view that you are looking for.
Should you decide to cancel the cropping process at any point, you can do so effortlessly by pressing the Escape key on your keyboard. This allows for a seamless user experience, giving you full control over your image or PDF's appearance.
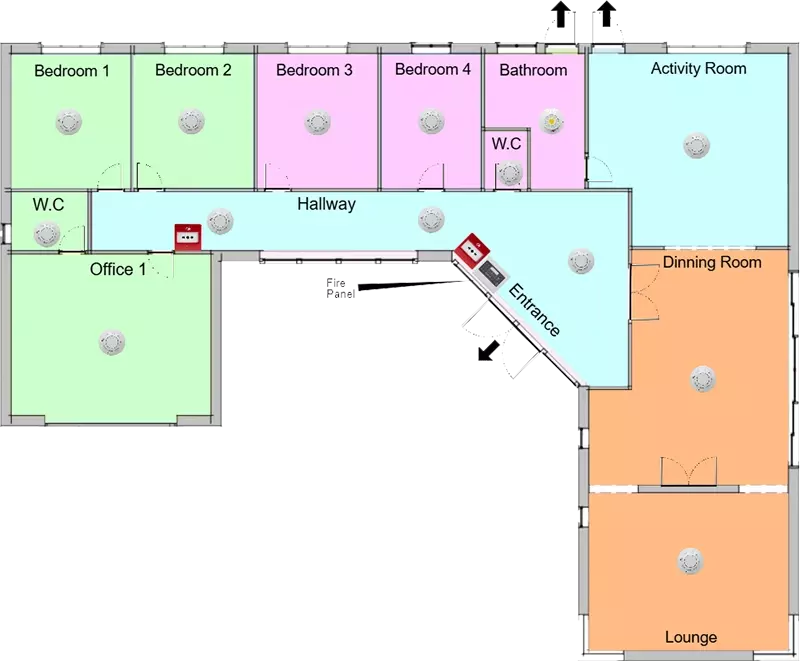
When working on a Fire Alarm Zone Plan or any other design, it's common to encounter irregularly shaped rooms. While this can pose challenges, the Zonify platform simplifies the process.
A new tool is being introduced that allows you to outline the room, and it will quickly fill it in according to your specifications. It’s incredibly efficient—this example took just a few clicks of the mouse.
Watch for the pen icon to appear in your toolbox, then click to start to draw your design on the screen.
You can simply import your logo directly in to the platform, ideally this needs to be a transparent PNG and the bigger the better !
If you don't have a transparent logo, email over to us and we will amend the image and return it.
Once you have the image you can place it where ever you wish, on what ever design you are doing.
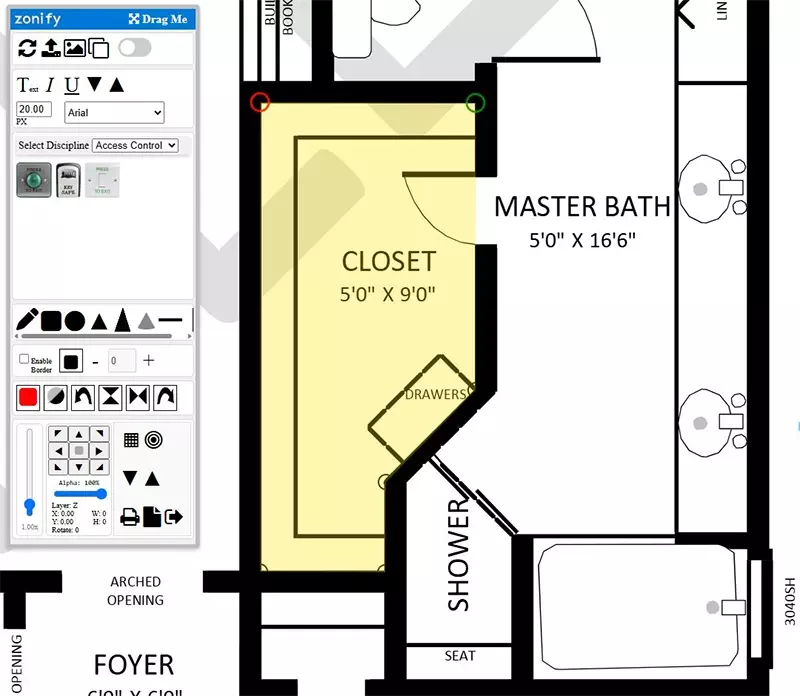
Using the custom drawing tool is easy, lets put into steps !
Step 1. Drag the tool to the design as show in the animation
Step 2. Mark out the shape you wish to fill, the green circle is the first point you marked and red is the last point you marked this is to help you know where you next point should be as it draws the yellow example fill.
Step 3. You have finished the marking out, press enter and the marked design will fill in your selected colour, dont worry if you have the wrong colour we can select any shape and then change the colour using the colour palette.
Notes.
If you want to remove a marked point you can press the backspace key to remove the last marked point, if you keep pressing backspace it will keep removing the marked points until it will take you our of using the tool.

Zonify enables you to effortlessly save your designs to the cloud. Simply create your design and save it with a click.
Upon starting Zonify, you'll be prompted to load a previously saved design—it's that easy!
Each license has 3 saving slots, we like to think of these as a scratch pad rather than a long term saving option, if we offered the saving as a long term option it would also push the prices up
When you load your plan, you can choose between two layouts: one optimized for printing on A4 or A3 paper, and the other designed for full-screen viewing.
Please note that Zonify does not save cable measurement designs.

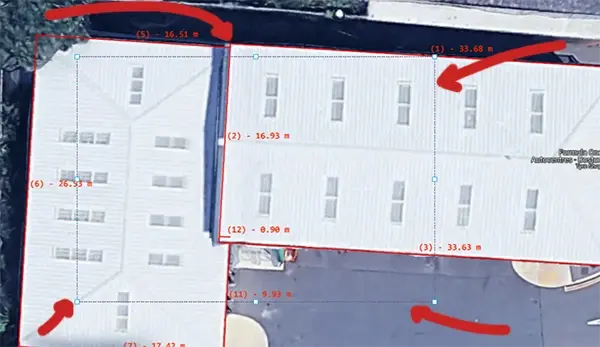
Ever wished Zonify allowed measurements where you could import an map image set a scale and quickly add your marking out onto the image, you know when you want to measure out cable runs ?
Your in luck Zonify now has a feature to do this and it does it well.
Here are the instructions.
1. Import your image or PDF and drag the measure tool to your design (The Tape Measure Icon)
2 Draw the first line over your scale so the platform can measure it, when it asks enter the value in meters, ie 1.981 is the correct entry for 1m 98cm or 1981mm
3. Once the scale is set move your cursor over your start point and right click this moves your start position.
4. Now you have moved your starting point move your mouse and you will see it measuring as it moves,
5. Click where you want to measure to and your line will be drawn along with the measurement
6. Continue to move your start point if you wish or just go from line to line and watch as each line is drawn along with the measurement.
7. Finished measuring? press the enter key !
Remember, anytime you want to move your starting point you just use the right mouse button again, it really is that simple !
Please note that Zonify does not save cable measurement designs.

This image is a screenshot from Google Maps and is used for illustrative purposes only. © Google and its data providers. Please note that this disclaimer does not guarantee the accuracy or suitability of the information depicted in the image
Zonify the new measuring tool, not so good on isometric drawings but hell your not supposed to measure cars.
This is the idea tool for measuring distances of site drawings, etc but its fun just measuring random things like cars.
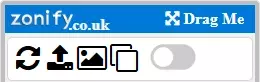
The key quick start buttons are located at the top of the toolbar.
From left to right, here’s what each button does:
1. **Refresh/Restart**: This button clears all content and restarts everything from scratch.
2. **Load PDF or Images**: This is one of the most essential buttons, allowing you to import PDF documents or images. You can mix and match and load multiple files, but remember to resize any imported file before adding another, or they may overlap.
(Be aware there is a 2.5mb import limit, if you send us the image or pdf we will amend the file and return it back so it can be imported, please allow some time to do this as we may be away from a machine.)
3. **Background Toggle**: This button hides or shows the background images, depending on your design needs. For instance, if you're using an existing plan in your design, you may want to keep it visible.
4. **Duplicate or Clone**: This button duplicates the currently selected object, with a few exceptions like the camera view. Pressing the "C" key on your keyboard also performs the same cloning action.
5. **Pan Locking**: You can click this button or use a right-click to toggle locking. When activated, it locks the background imported document in place, allowing you to move the entire design with your mouse. If not locked, you can move images and objects independently.
The toolbar has a drop down showing disciplines this allows you to select from any number of available icons, in this instance we are showing CAD images but there are realistic objects like smoke detectors, fire panel, doors, windows, etc.
These available objects can be updated at any time to increase the available toolset further expanding the detail that can be included into your designs.
If there is some specific objects you would like to see added to the toolbar please reach out using the contact form, its also helpful if you have images available.
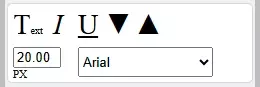
Text tools allow you to choose your desired font and apply different styles such as underlining and italics.
Once you have setup you font, you can drag the "Text" element into your design and position it as you wish.
It's quite intuitive to place your text anywhere with the ability to easily resize and rotate your text just where you need it.
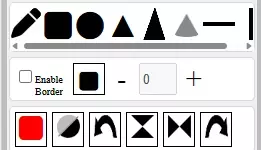
The first icon on the top left corner is the draw tool as shown previously, the other shapes on the top bar are all drawable shapes you can drag onto your design.
All shapes can all be resized and orientated to how ever you need them to be on your design, you can select the border colour and size along with the colour you wish the shape to be so you have plenty of options to define your shape.
On the bottom row we have the invert button this only works on objects and not shapes so doors for example if you invert them the colours will reverse which is idea depending on the underlying colour.
The other arrows and triangle buttons are rotate and mirroring tools, for example if you place one door that's been sized you can clone the door and change its orientation by pressing one of the rotate or mirroring buttons to very quickly build up your doors so you really only have to just place them in situ rather than having to place, resize and orientate each door.
There are several key commands that are quite important to know when using the platform so we have a list, I would check here from
time to time as the last may grow as the platform continues to be developed.
Please take a look at the controls page to see more about the shortcuts and mouse commands, it will be useful when using the platform and the commands are quite likely to change or increase in their number.
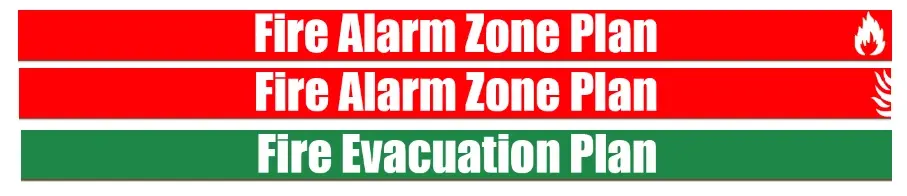
Within the toolbox we do have some sample headers to help build your zone plans but.....
You can actually take your design and put it straight into a word document, so if you have your own business stationary you simply build your template in word and drop in your zone plan design.
This is why we like to call a client view where you can build a wall to demonstrate what the equipment may look like on the wall.
This just demonstrates another use for the platform.
